
VeraCrypt is a tool for establishing and maintaining an on-the-fly-encrypted volume/disk/data storage device.
On-the-fly encryption means that data is automatically encrypted right before it is saved and decrypted right after it is loaded, without any user intervention. No data stored on an encrypted volume can be read/decrypted without using the correct password/keyfile(s) or correct encryption keys. The entire file system is encrypted (e.g., file names, folder names, contents of every file, free space, metadata, etc).
The virtual disk will be entirely encrypted including file names, allocation tables, free space, etc. We can save or copy, or move, files to this virtual disk and they will be encrypted on the fly as they are being written. If we open a file stored on a VeraCrypt volume, for example, in a media player, the file will be automatically decrypted to RAM/memory on the fly while it is being read.
We will take a look at the Windows version of Veracrypt in this tutorial. To create and use a VeraCrypt volume to encrypt and protect your files perform the following steps…
Download and install VeraCrypt from https://www.veracrypt.fr
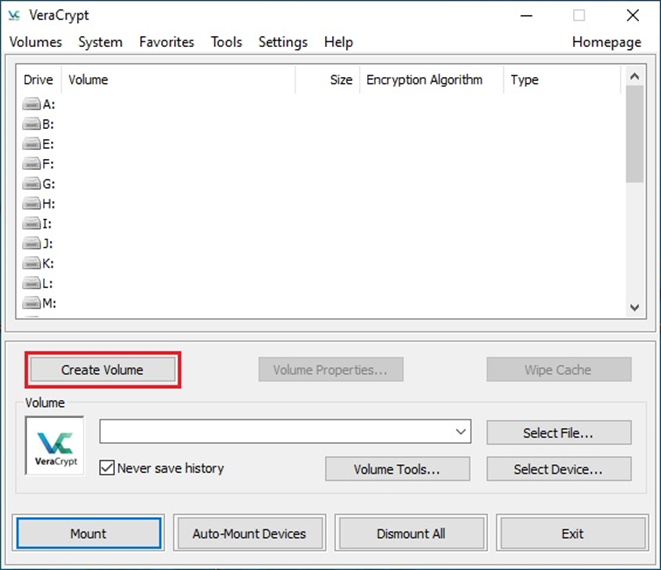
- When opening VeraCrypt, the program’s main user window will display an option to create the Veracrypt encrypted volume. Click on Create Volume.
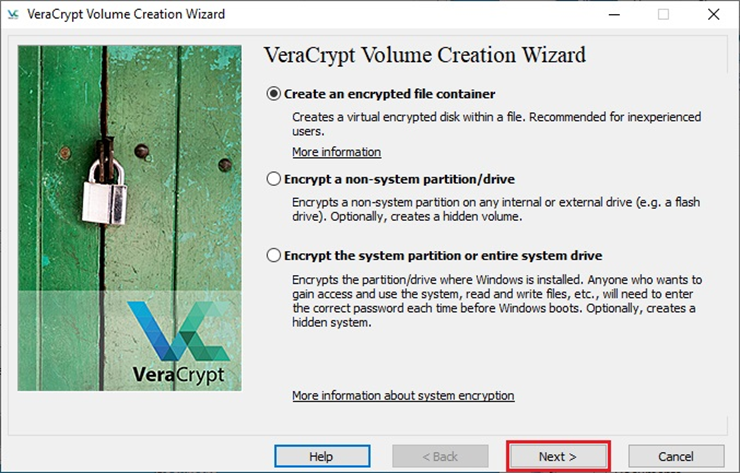
- The VeraCrypt Volume Creation Wizard should appear. It should list multiple options. But we need to create a new encrypted VeraCrypt volume. Choose to Create an encrypted file container and click Next. Note that the rest of the Wizard options deal with encrypting already existing partitions including the operating system partition.
- The next window will give us the option to choose between Standard and Hidden VeraCrypt volumes. Hidden volumes provide a stealth feature as the name suggests. But they must reside in an already existing Veracrypt encrypted volume. More details on Hidden Volume can be viewed at https://veracrypt.eu/en/Hidden%20Volume.html Since we do not have a Hidden Volume, for now, we will choose the Standard VeraCrypt volume. Proceed by clicking Next.

- Specify where we wish the VeraCrypt volume to be created. Click Select File.
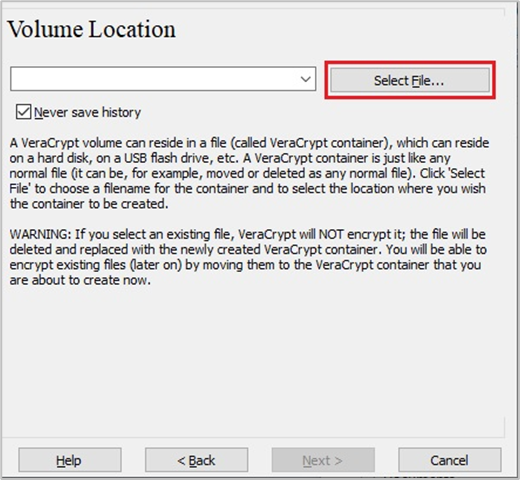
- The standard Windows file selector should appear. Let us create the VeraCrypt volume as C:\Data\MyVolume.hc. Click Save. VeraCrypt will create the new container file. Further, we can also select the option Never save history for more security. Once this is done, click Next.
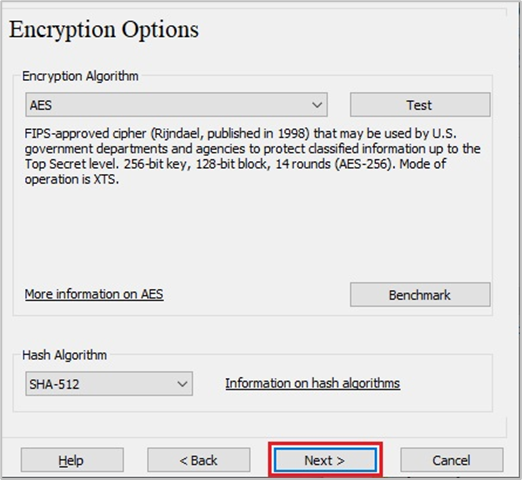
- Choose the Encryption Algorithm and a Hash Algorithm for the volume. By default, they are AES and SHA-512 respectively.
- NOTE:
- Encryption Algorithms described at https://www.veracrypt.fr/en/Encryption%20Algorithms.html
- Hash Algorithms described at https://www.veracrypt.fr/en/Hash%20Algorithms.html
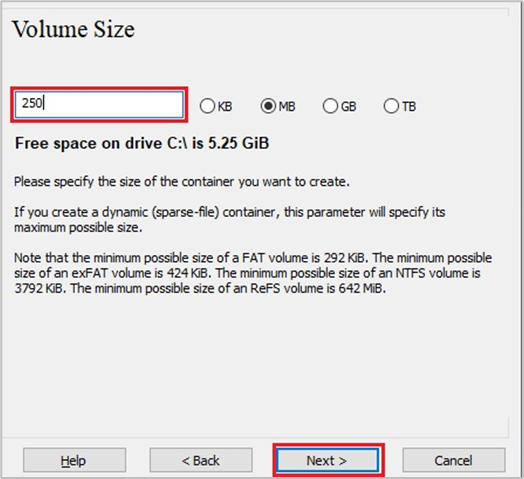
- Now let us specify the size of our VeraCrypt container. We are giving our test container a size of 250 MB. Choose your desired size and click Next.
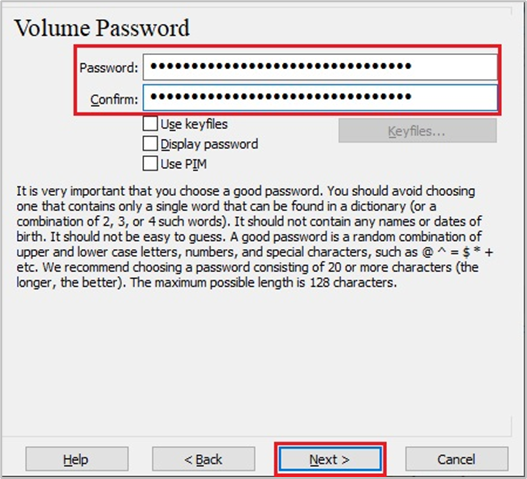
- Choose a complex alphanumeric password for the volume. To generate a secure password, we can use the LastPass password generator at https://www.lastpass.com/features/password-generator
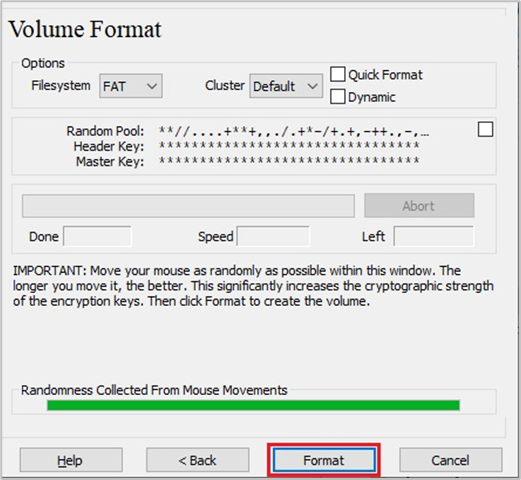
- The last option that shows up will be to format the Veracrypt volume. Here we can also configure various options such as Filesystem, Cluster, Quick Format, and Dynamic. More details on these options can be viewed at https://documentation.help/VeraCrypt/Creating%20New%20Volumes.html Move the mouse as randomly as possible within the Volume Creation Wizard window. This is to gather random data to increase the cryptographic strength. When the randomness indicator becomes green, click Format and the volume creation process will begin. Once this process finalizes, the new VeraCrypt Container file will be created.
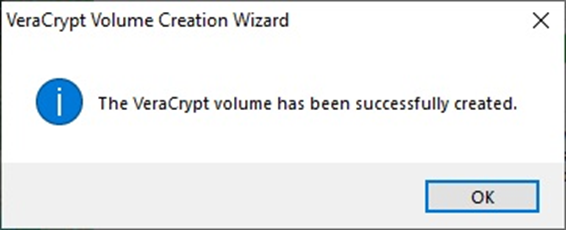
- Finally, the Volume Creation Wizard shows us that the volume was created successfully. Click OK to close the dialogue box, and Exit the VeraCrypt Volume Creation Wizard.
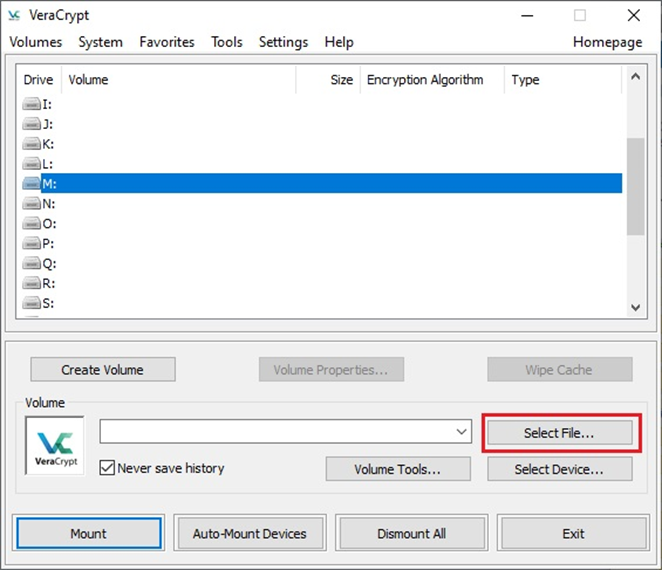
Now since we have created an Encrypted Veracrypt volume, let us mount it to a new Volume. In the main VeraCrypt window, select a drive letter from the list to which the VeraCrypt container will be mounted. Then click Select File…
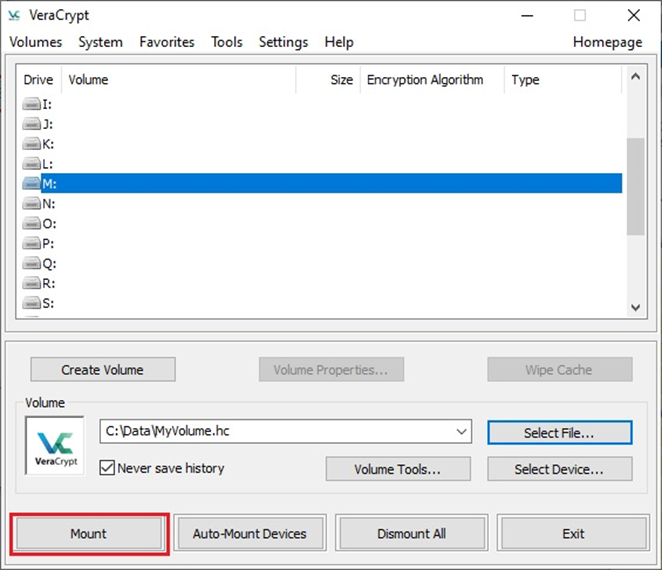
- The standard file selector window should appear. Browse to the container file and select it. In our case, the VeraCrypt volume was C:\Data\MyVolume.hc. Select the file and click Open. In the main VeraCrypt window, click Mount.
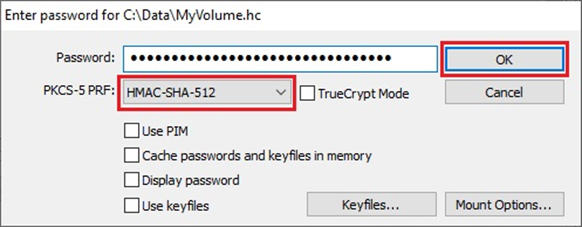
Since the Container is encrypted, Veracrypt will now ask us for the password. This is the one that we entered during the volume creation process. Enter the password in the password prompt window, and click OK.
NOTE: The password prompt window provides us with different options to customize the security as required. These options can be viewed in detail at https://documentation.help/VeraCrypt/Personal%20Iterations%20Multiplier%20(PIM).html
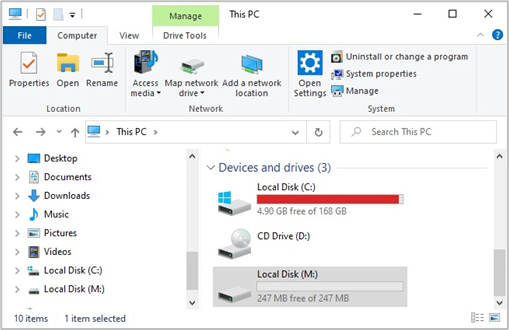
If we have used the correct password, the Encrypted Veracrypt container will be mounted as the Virtual Disk (M:) in Windows. This drive will also be visible in the Windows Explorer just like regular volumes.
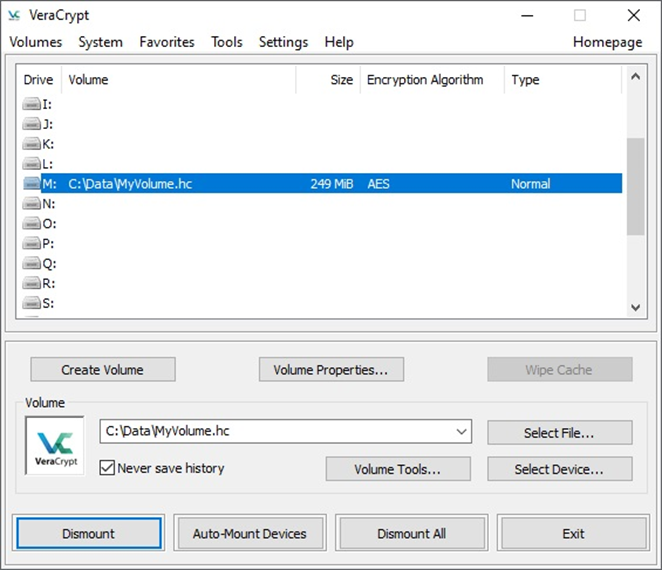
Success!! We can see that there is a new drive M: listed in the Windows Explorer.
Now we can start writing data to volume M: Once we finish our work with the mounted volume, we can dismount the volume. Actually, we should dismount the volume if data in the volume is sensitive, and it should be kept away from prying eyes. Dismounting the volume can be done by selecting the volume from the list of mounted volumes in the main VeraCrypt window and clicking Dismount. It must be noted that, for security purposes, the VeraCrypt volume will always be in dismounted status when the Windows operating system starts up.
VeraCrypt is a wonderful open-source program that works on Linux, macOS, and Windows. There is unofficial support for Android, and iOS also. Make use of this application, follow security best practices, and use defence-in-depth to protect your data and privacy.